It’s a beautiful Sunday morning here at Pantry Bliss HQ. The sun is out, a fresh coffee is in hand, and the weekend possibilities are endless. But before you head out, let’s talk about a project that could transform your entire week: tackling the pantry.
We’ve all been there. You open the door and face a jumble of half-empty bags of pasta, three different jars of paprika, and a can of beans you swear you bought back in 2022. It’s frustrating, wasteful, and the opposite of inspiring.
An organised pantry isn’t just about looking good; it's the foundation of effortless cooking. It saves you time, money, and brings a sense of calm to your kitchen. With our 5-step Pantry Bliss Method, you can turn that chaotic space into a functional, beautiful hub of inspiration.
Ready to roll up your sleeves? Let's begin.
The 5-Step Pantry Bliss Method
This method is a simple, systematic approach to reclaiming your pantry. All you need is a few hours to get it done.
Step 1: The Great Empty
First, take everything out. Yes, everything. Place it all on your kitchen counter or dining table. This is the most crucial step because you cannot organise clutter. You need a completely blank slate to see the space you’re working with and to properly assess what you own.
Action Tip: As you empty, create three piles:
-
Keep: Items that are in-date and that you will use.
-
Donate: Non-perishable items that are in-date but you know you won't use. Consider donating to a local charity like Foodbank.
-
Toss: Anything that is expired, stale, or has seen better days.
Step 2: The Refreshing Clean
With the pantry empty, give it a thorough clean. Vacuum up any lingering crumbs and dust. Then, wipe down every single shelf, wall, and surface. A simple solution of warm water with a splash of white vinegar is incredibly effective and food-safe.
For great advice on non-toxic cleaning solutions, check out this guide from Healthline.
Step 3: The Smart Categorize
Look at your "Keep" pile and begin grouping like items together. This is the 'Aha!' moment where you’ll finally see that you own four bags of almond flour. Creating logical categories is the key to an intuitive system.
Common categories include:
-
Baking: Flours, sugars, baking soda, chocolate chips.
-
Grains & Pastas: Rice, quinoa, spaghetti, couscous.
-
Oils, Vinegars & Sauces: Olive oil, soy sauce, tomato passata.
-
Canned Goods: Beans, tomatoes, coconut milk, tuna.
-
Spices & Seasonings: Group them all together!
-
Breakfast: Cereals, oats, honey, breakfast biscuits.
-
Snacks: Crackers, nuts, dried fruit.
Step 4: The Art of the Contain
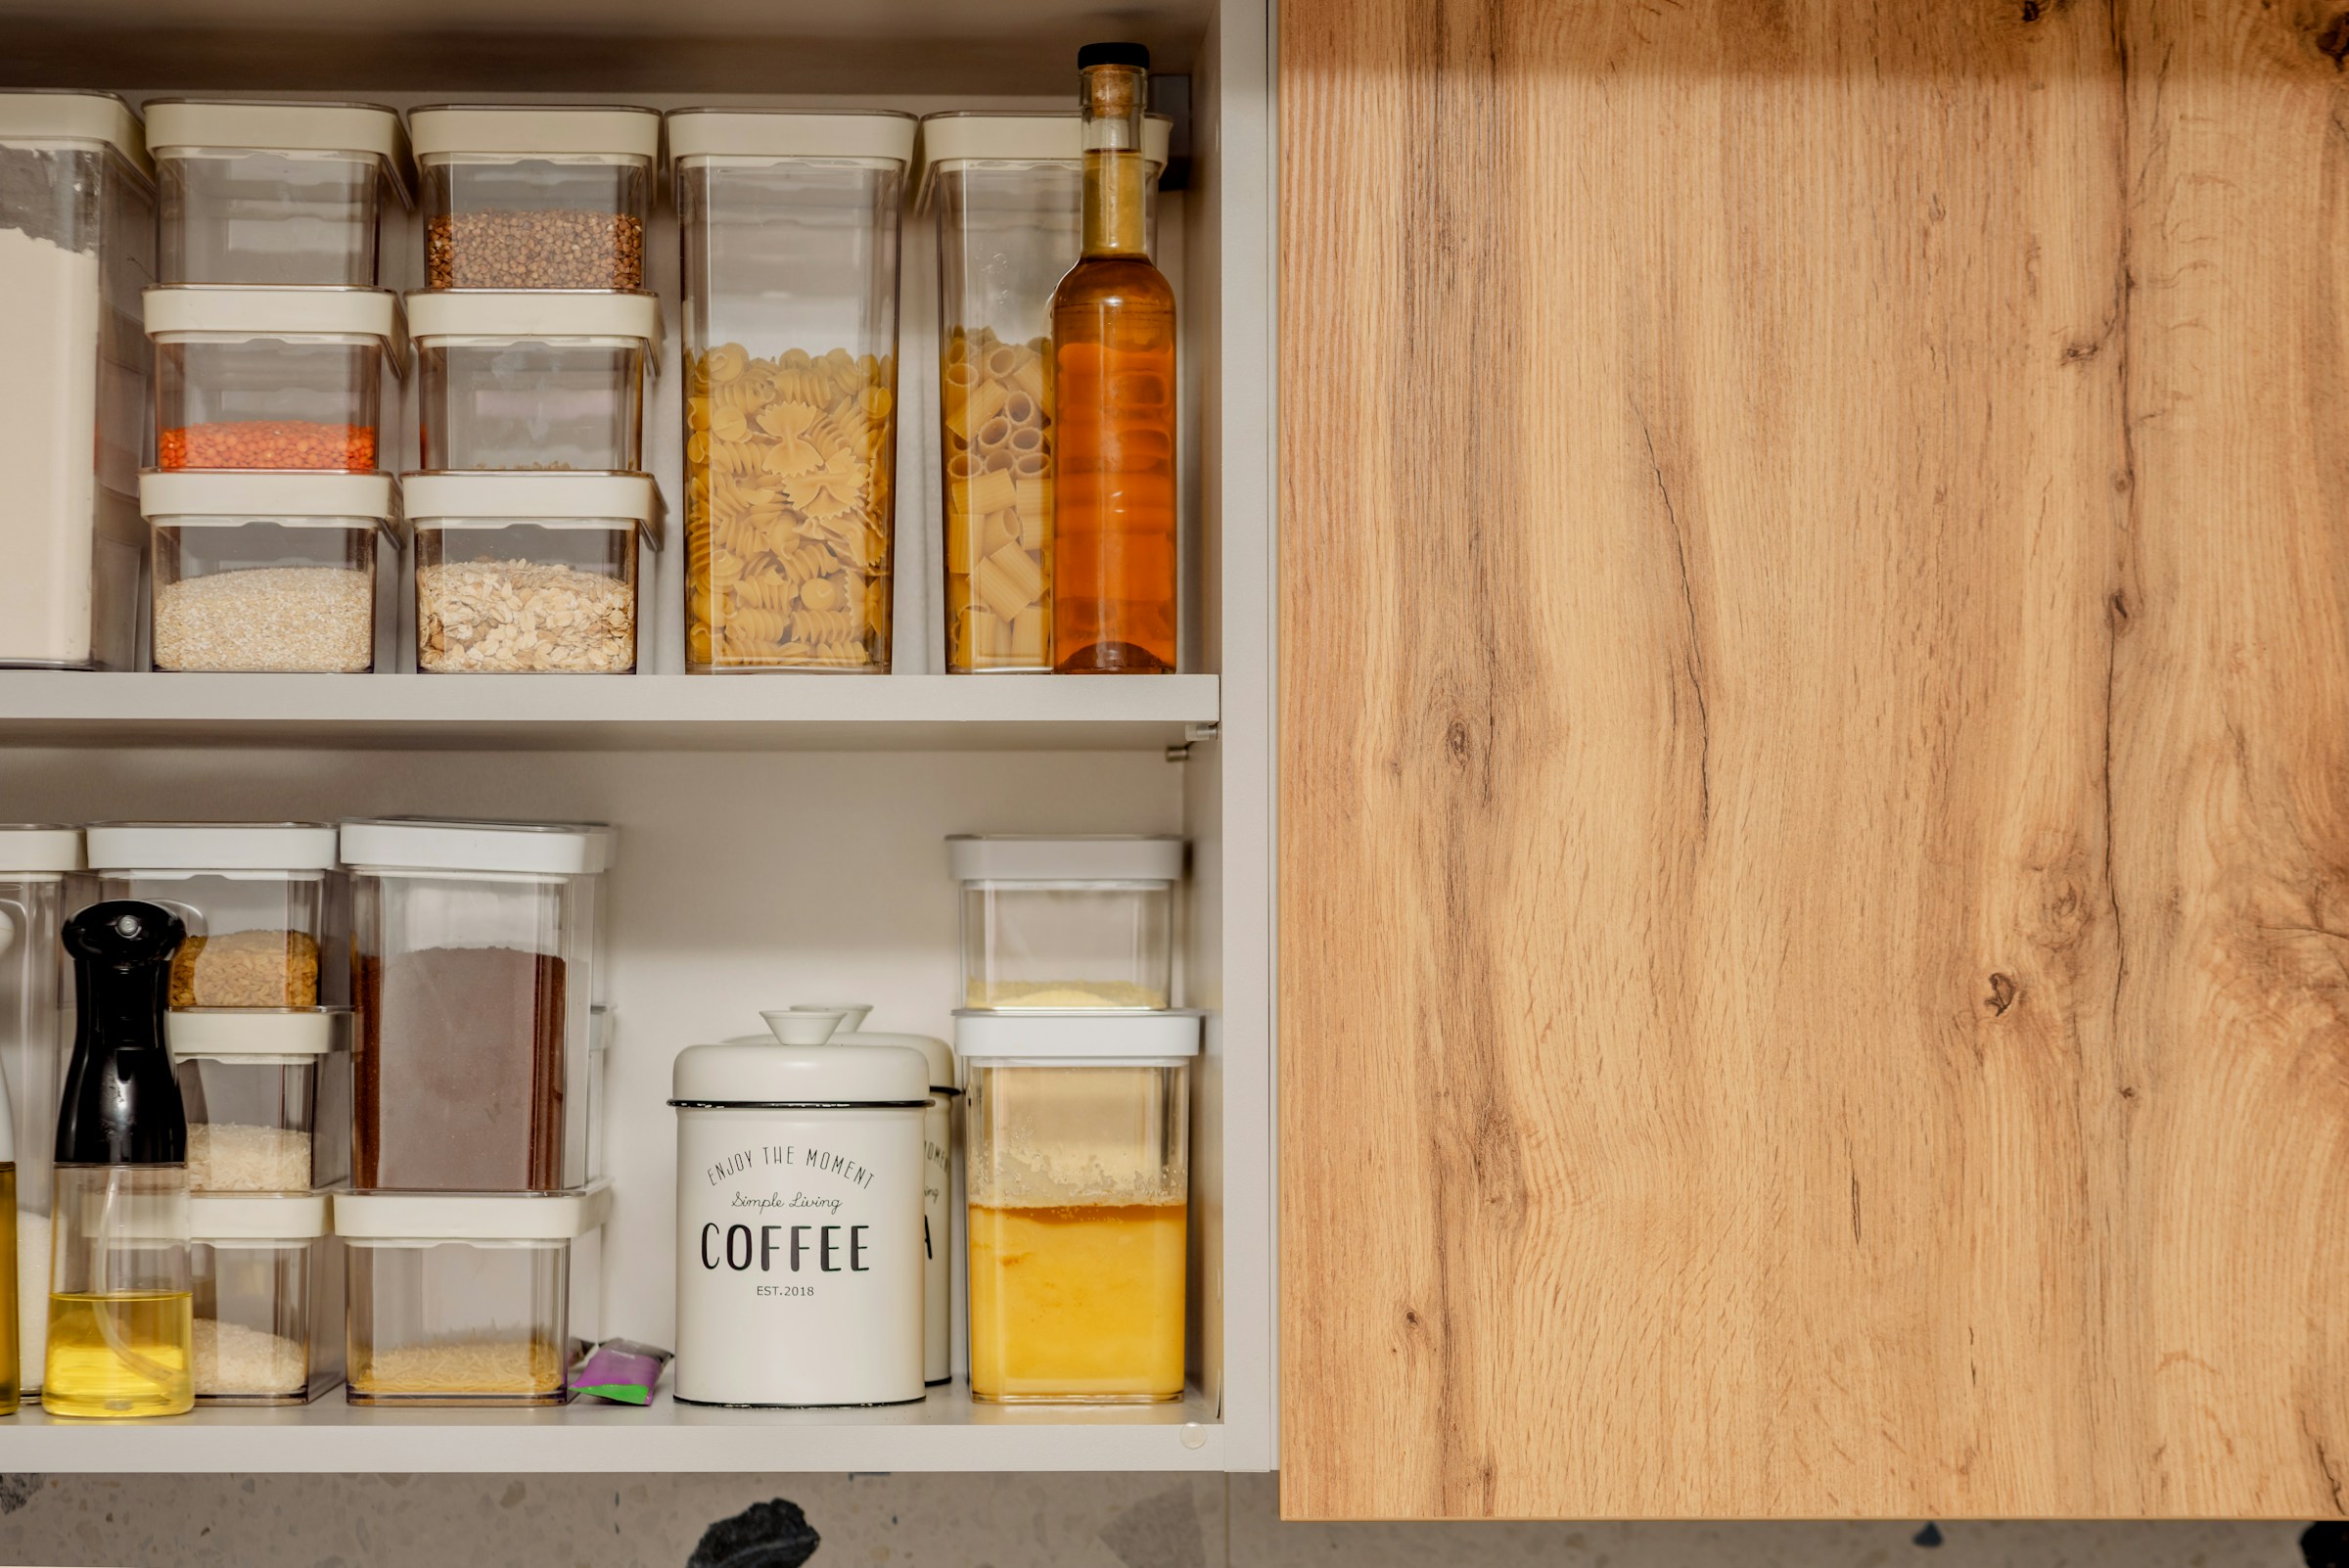
Now for the fun part: putting everything back in a structured way. Decanting staples from their messy packaging into uniform containers is the single biggest game-changer for pantry organisation.
Choosing the Right Storage Containers This is a key decision. Here’s a breakdown of the most popular options:
-
Glass Jars
-
Pros: Visually beautiful, non-porous (won't stain or hold odours), plastic-free, and long-lasting. Seeing your ingredients inspires you to use them.
-
Cons: Can be heavy and breakable, and often more expensive upfront.
-
Best For: Flour, sugar, oats, pasta, rice, lentils—anything you want to see clearly.
-
Where to find: I've been using LocknLock for the past year and have found them to be fantastic! Amazon, Kmart and IKEA offer fantastic, affordable options.
-
-
Airtight Plastic Containers (BPA-Free)
-
Pros: Lightweight, highly durable, and often designed to be modular and stackable, making them incredibly space-efficient. Usually more budget-friendly.
-
Cons: Can stain over time and may retain odours from strong foods. Always look for the "BPA-Free" label.
-
Best For: Cereals, kids' snacks, crackers, and anything in a high-traffic pantry where breakage is a concern.
-
Where to find: Local brands like Décor and Sistema are excellent and widely available.
-
-
Ceramic Canisters
-
Pros: Opaque, which protects contents from sunlight. This is ideal for maintaining the flavour and potency of certain ingredients. They also add a stylish, decorative touch.
-
Cons: You can't see the contents (labels are a must!), they can be heavy, and may chip.
-
Best For: Coffee beans, loose-leaf tea, and delicate spices that degrade in light.
-
Pro Tip: Don't forget other organisational tools! Use turntables (Lazy Susans) for oils and vinegars in deep corners, tiered risers for canned goods so you can see every label, and woven baskets to corral loose packets like spice mixes or bags of chips.
Step 5: The Effortless Maintain
Your pantry is beautiful! The final step is to keep it that way.
-
Label Everything: Use a simple label maker or chalk pen. This ensures everyone in the house knows where things go.
-
One In, One Out: When you buy a new bag of flour, use up the old one first before refilling the container.
-
Digital Inventory: This is where Pantry Bliss shines. As you use up ingredients, update your digital pantry in our app. This makes grocery shopping a breeze and powers our AI to give you recipes based on what you actually have.